Essential Tips for Photographing Birds in the Wild: A Complete Guide
October 11, 2024
Capturing the breathtaking beauty of birds in their natural habitat is both an art and a science. The pursuit often leads to frustration when photos come out blurry or unremarkable despite investing in good equipment. This common struggle highlights that successful bird photography requires more than just pointing a camera at a winged subject; it involves understanding bird behavior, using the right gear, and perfecting techniques tailored to various conditions.
After countless early morning hikes and patient waiting, I've gathered insights from professionals and tested numerous setups myself. From scouting ideal locations at dawn's first light to making sense of aperture settings for moving targets, each piece of advice here has been tried in the field. Yet, having the best camera doesn't guarantee great shots without knowing when and where to shoot—even considering how soft morning light transforms an ordinary shot into something spectacular. With this foundation in equipment choices, let’s embark on improving your bird photography skills comprehensively.
To photograph birds in the wild successfully, start by identifying your subject and isolating it from a cluttered background to enhance focus. Additionally, arrive early or stay late to take advantage of optimal lighting conditions, and practice patience while allowing the birds to approach you naturally for the best shots.
Essential Equipment for Bird Photography
When diving into bird photography, the choice of camera and lens can significantly influence your results. For those starting out, a DSLR or mirrorless camera such as the Canon EOS Rebel T6 serves as a reliable foundation. Its user-friendly interface makes it suitable for beginners while also delivering decent image quality.
However, if you’re a more experienced photographer seeking greater performance, higher-end models like the Nikon D850 offer exceptional capabilities, particularly with fast autofocus systems and impressive burst modes that help seize fleeting moments—think of a hummingbird hovering mid-flight.
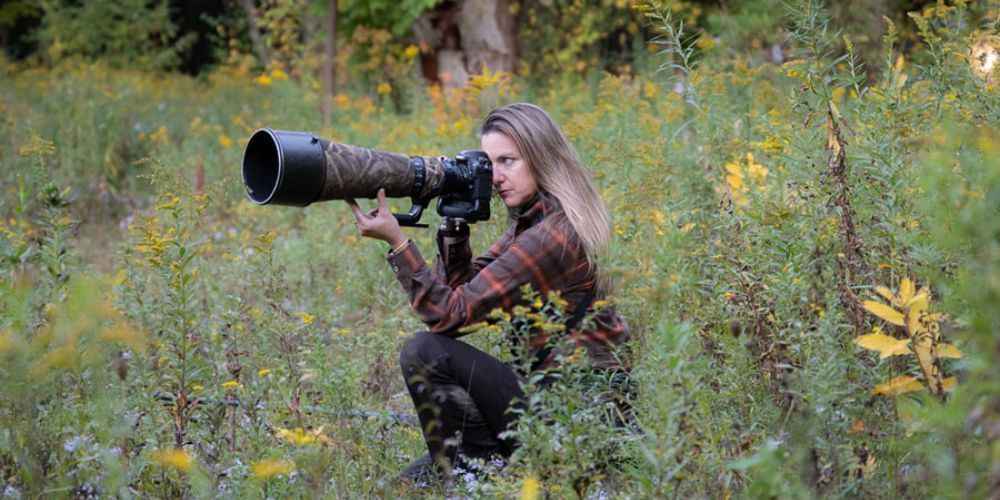
A telephoto lens, like the 100-400mm, becomes an invaluable tool in your arsenal, as birds are typically shy creatures that prefer to keep their distance. By using a zoom lens, you can bring wild birds closer without encroaching on their space or altering their behavior. This type of lens not only enhances your compositional options but also allows for creative exploration of different perspectives that would normally be unattainable.
Of course, stability is paramount when photographing skittish subjects like birds. This makes a sturdy tripod an indispensable accessory. A solid tripod helps eliminate camera shake which is especially noticeable when using heavier lenses. Investing in a lightweight yet durable model like the Manfrotto BeFree can make all the difference during long shooting sessions in nature or while hiking trails.
Complementing your main gear with thoughtful accessories can improve your bird photography experience. Here’s a quick overview of must-have items:
| Accessory | Purpose | Example |
|---|---|---|
| Telephoto lens | Close-up shots of distant birds | Canon 100-400mm |
| Tripod | Stabilizes camera for clear images | Manfrotto BeFree |
| Extra batteries | Ensures longer shooting sessions | Canon LP-E17 Battery Pack |
| Memory cards | More storage for high-res photos | SanDisk Extreme PRO |
| Binoculars | Helps in locating birds from a distance | Nikon Monarch 5 |
Having this equipment at your disposal lays the groundwork for success; however, even the best gear requires skillful application to truly capture stunning images in the wild.
Picking Ideal Times and Locations
Morning and Evening Advantage
Timing in bird photography is crucial, as it directly influences both the number of birds you encounter and the quality of your images. Birds are most active during early morning and late evening hours, feeding or preparing for rest. This activity isn't just about quantity; the lighting conditions during these times—often referred to as the golden hour—are softer and more flattering, creating beautiful contrasts that truly bring your photographs to life. Think of it like painting a scenic sunset—everything looks better with warm, natural light.
But finding those perfect moments isn’t solely about the clock; it’s also about knowing where to be.
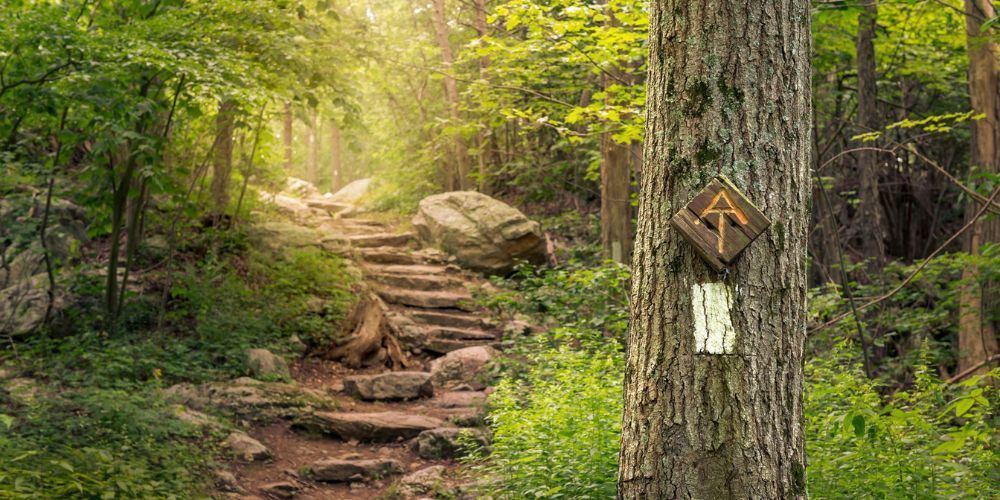
Finding the Right Spots
Location plays an equally vital role in capturing incredible bird photography. Research local hotspots renowned for their bird activity, which often include wetlands, forests, parks, and nature reserves. Websites like eBird serve as invaluable resources in tracking bird sightings specific to your area. By tapping into these platforms, you can discover where birds are congregating seasonally or even daily, thereby increasing your chances of witnessing unique behaviors or rare species.
Moreover, spending time in these locations allows you to familiarize yourself with the environment and understand the kind of birds that inhabit those areas. Knowing their habitats will position you favorably when they appear.
Whether you're perched quietly on a park bench in a nature reserve or standing still among bushes in an open field, strategically positioning yourself can make all the difference. Different seasons attract different birds, so staying informed about seasonal behavior will further bolster your photography journey.
By harmonizing your timing with strategic location choices, you'll greatly enhance your ability to capture remarkable images while immersing yourself in nature's wonders. Let's now explore techniques that will elevate your bird photography skills.
Mastering Bird Photography Techniques
The essence of exceptional bird photography lies in mastering specific techniques that enhance image quality and allow for an immersive viewing experience. One key technique is utilizing fast shutter speeds to freeze fleeting moments that can define a photograph. Aim for a shutter speed of 1/1000 second or faster to truly capture the dynamic nature of birds. Capturing a bird mid-flight is similar to photographing an athlete in motion; just as motion blur from a soccer player’s kick might ruin a shot, it can detract from the overall effect in bird photography. Increasing your shutter speed helps prevent blurring and preserves the details of feathers rippling against the backdrop.
With speed taking center stage, let’s discuss how to ensure your subject remains sharp and vibrant within the frame.
Focusing Techniques
Effective focusing techniques are crucial, especially when dealing with active subjects that flit about unpredictably. Continuous autofocus modes—like AI Servo for Canon users or AF-C for Nikon enthusiasts—allow you to track your bird as it moves, ensuring that it remains sharp throughout changes in position. This may take practice, but it’s essential when photographing species known for their erratic behavior. A great way to develop this skill is to practice on more predictable subjects, such as pets running around in your yard; they offer opportunities to experiment without the pressure of getting it perfect on the first try.
As careful focusing sets the foundation for great images, understanding your equipment's settings amplifies your chances of capturing breathtaking shots.
Becoming familiar with your camera's settings allows you to adapt quickly to changing conditions and meet any photographic challenge head-on. Switching to Aperture-Priority Mode is beneficial for controlling depth of field while letting the camera select an appropriate shutter speed. This mode beautifully blurs backgrounds and isolates birds against softer backdrops—creating that coveted fine art aesthetic. If you're more experienced or adventurous, consider using Manual Mode, which gives you complete control over exposure settings. While this method requires comfort with your camera's features, the creative freedom it offers can be tremendously rewarding.
But knowing how fast to shoot and how to focus are only parts of the equation; lighting also plays an equally important role.
Understanding lighting conditions is fundamental to achieving vibrant photographs that pop with detail and nuance. The golden hours—shortly after sunrise or right before sunset—offer soft light that can transform an ordinary scene into something magical. During these times, colors appear richer, and shadows become gentler, enhancing textures and highlighting beautiful patterns found on bird feathers. Arriving at your chosen location during these prime times sets you up for success before you've even clicked the shutter.
By becoming adept in these techniques and approaches, you enhance your ability to capture incredible bird images while immersing yourself deeper into the art of bird photography itself—each click revealing new intricacies and stories worth telling.
Equipping yourself with these foundational skills prepares you well for tackling movement challenges next, particularly when it comes to capturing birds in action.
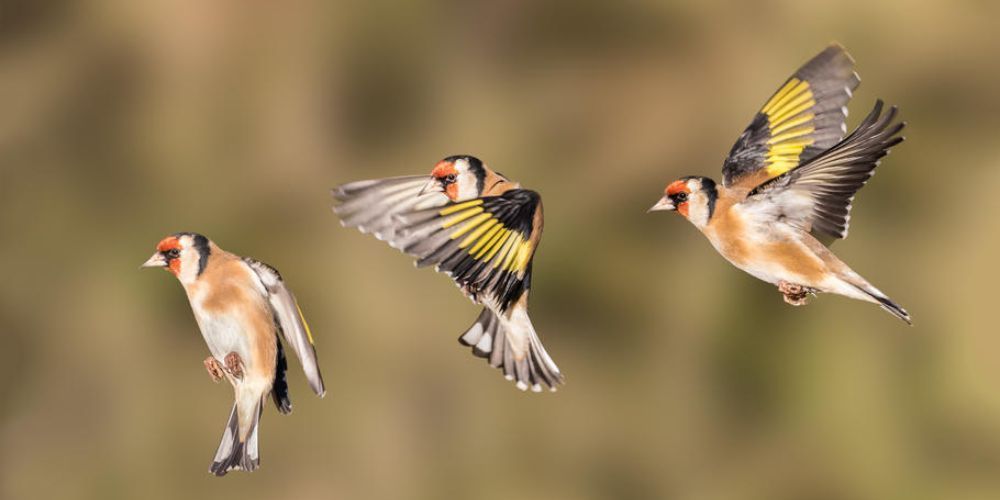
Tips for Capturing Birds in Flight
Capturing a bird in flight can seem daunting at first, especially when you consider their swift movements and unpredictable patterns. However, with patience and practice, you can improve your chances of snapping that perfect shot. One foundational tip is to anticipate the bird's behavior. Birds often have predictable flight paths based on their feeding habits or nesting patterns, so observing them for a while before you start shooting can make all the difference.
Panning Technique
Developing a solid panning technique is crucial as it allows you to follow the movement of a bird smoothly. Picture this: you're standing quietly in a field, watching as a hawk glides through the air. To achieve sharp images, align your body with its path and smoothly follow along. It's as if you are dancing with the bird, feeling each subtle movement as it takes flight. Using a monopod can offer additional stabilization while keeping you nimble enough to track these fleeting moments.
Remember, practice is essential. Spend some time at home panning with your camera—preferably while photographing fast-moving objects like cars or even family members running away from you! This will help build muscle memory, making it easier to follow birds in motion when you head outside.
Burst Shooting
Another effective method is engaging your camera's continuous shooting mode. This allows you to capture multiple frames every second which significantly increases your chances of getting that one shot where everything aligns perfectly—the wings extended, eyes clear, and details sharp. There are few things more exhilarating than scrolling through dozens of frames only to find that golden moment tucked in there among what might seem like chaos.
It’s important to maintain perspective: even seasoned photographers often end up with countless unusable shots amidst their collection of successes. The key is to not become discouraged by these “misses.” View them instead as stepping stones on your journey to becoming more attuned to light conditions and bird behaviors. Learning from each missed shot propels you closer to those magnificent captures that leave lasting impressions.
As we refine our techniques for capturing these dynamic subjects, our focus will soon shift to how understanding and leveraging light can elevate our photographs significantly.
Maximizing Light and Angles
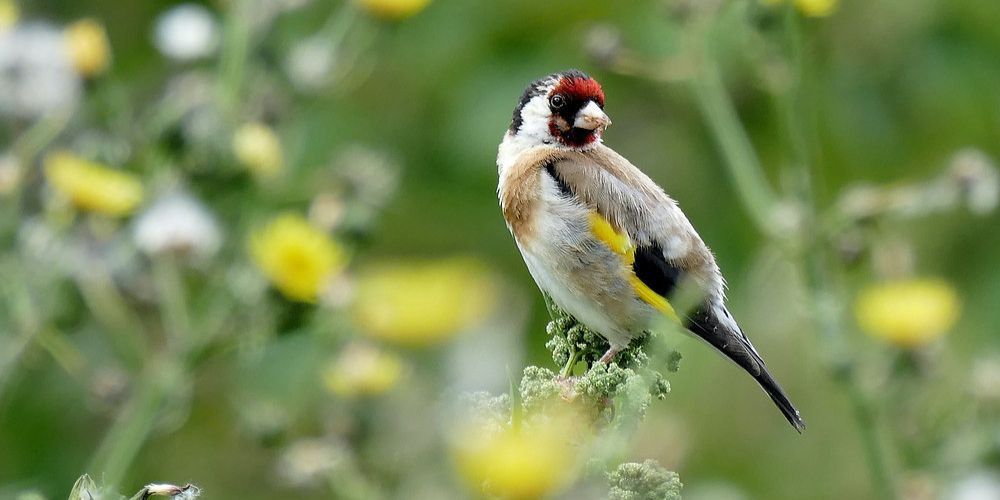
Good lighting is the cornerstone of compelling bird photography, transforming an ordinary shot into something extraordinary. Early morning and late afternoon offer the most beautiful light for capturing birds in their habitat. This "golden hour" creates softer shadows, accentuating the vibrant colors of the feathers while making the surroundings dance with a warm glow. Conversely, harsh midday sunlight can produce unflattering shadows that wash out details in both your subjects and backgrounds. Thus, timing your shots can make a significant difference, ensuring you're using the best possible light to highlight the birds you are photographing.
Using Natural Light
Light direction is just as crucial as its intensity. For instance, backlighting can yield striking silhouettes against a colorful sky but may mask details if you desire to showcase the bird's features. On the other hand, side-lighting provides texture and dimension, drawing attention to every feather’s intricate pattern, which can enliven your captures in a subtle yet powerful way. Each approach offers its own unique feel, so experimenting with various angles allows you to discover what works best for every individual shot.
Alongside mastering light conditions, adjusting your position in relation to where the bird is perched or flying is key for optimal framing.
Adjusting Based on the Bird's Position
To truly maximize your angles, consider getting low to the ground when photographing ground-dwelling birds; this perspective often provides a more intimate view and can make them appear larger than life in comparison to their environment. Similarly, if you are shooting upwards at birds nestled in trees, you not only capture their full silhouettes against the sky but also create a sense of grandeur as they dominate within their natural landscape.
Here are additional adjustments to keep in mind:
- Experiment with focal lengths: Different lenses can provide unique perspectives on birds without infringing on their personal space.
- Utilize natural perches: Take advantage of branches or rocks when composing your shot. These elements can naturally frame your subject and lend context to its setting.
- Stay aware of surroundings: A well-composed shot isn’t solely about the bird; considering background elements is equally important to avoid distractions that detract from your main focus.
Mastering these aspects of light and angles is integral to elevating your bird photography, creating striking details and narratives within each frame. From here, we can shift our focus toward techniques that foster the patience necessary for successful wildlife photography.
Strategies for Patience and Stealth
Capturing birds in their natural environment is as much an art as it is a science. It demands not only skill in handling your camera but also an ability to embrace patience and remain undetected. One of the most effective strategies is blending in with your surroundings.
When you wear camouflaged clothing that mimics the natural tones of the habitat, you're becoming part of the landscape. Picture this: wearing earthy greens or browns will help conceal you, making it easier for birds to roam freely without feeling threatened. Remember, even simple elements like a hat or scarf can break up your outline, making you less conspicuous.
Additionally, using portable blinds can create an even more effective barrier between you and the birds. By setting up a blind strategically in areas where birds frequent—like near feeders or watering spots—you allow yourself a space to observe without interruption. This setup enables you to stay hidden while waiting for perfect moments to capture.
Think of it as a waiting game; some of the most stunning bird photographs arise only after hours of quiet observation and stillness.
Now, let's discuss how patience pays off in this endeavor. Staying quiet and avoiding sudden movements is crucial; any unexpected noise or motion could send birds soaring away in an instant. Instead, try to embody serenity. Veteran bird photographers will tell you that sometimes sitting quietly while observing yields unexpected results—birds might approach out of sheer curiosity when they feel safe. Maintaining calm transforms your experience, allowing for more dynamic captures as wildlife behaves naturally around you.
Those stunning images that garner accolades often stem from extensive periods of waiting—veterans highlight that their award-winning shots were born from unwavering commitment and keen observation.
Incorporating these strategies into your bird photography routine may require deliberate practice but will ultimately enhance your skills over time. Each successful click of the shutter after hours spent in silent anticipation reaffirms that patience and stealth are pivotal components to elevating your craft.
As you refine these techniques, remember that every outing offers an opportunity for growth, allowing you to connect more deeply with nature while capturing its beauty through your lens.
What camera settings are best for photographing birds in the wild?
For bird photography, optimal camera settings can make a huge difference. Start by setting your camera to Shutter Priority mode, which lets you control the shutter speed while the camera adjusts other settings. Birds are fast-moving, so a high shutter speed (around 1/1000 or faster) helps freeze their motion. An ISO between 400-800 works well for bright daylight, but you can increase it for low-light situations. As for the aperture, keep it wide (f/4 to f/6.3) to achieve a nice background blur, which helps the bird stand out. If possible, shoot in RAW format to allow for better post-processing flexibility.
What equipment is essential for bird photography?
Essential equipment for bird photography includes a camera with a fast burst rate, such as a DSLR or mirrorless model, and a telephoto lens. A 300mm lens is a great starting point, but for more distant birds, lenses from 400mm to 600mm are ideal. A sturdy tripod or monopod is essential for stability, especially with heavier lenses. A good camera bag for protection and storage, binoculars for scouting, and a lens hood to reduce glare are also helpful. If you’re photographing in areas where birds are likely to stay distant, consider using a teleconverter to extend your focal length.
How can I get close to birds without scaring them away?
To get close to birds, patience and a careful approach are key. Start by observing from a distance and moving slowly to avoid startling them. Wearing neutral-colored clothing can help you blend into your surroundings. Use available cover, like trees or bushes, to approach gradually. Setting up near feeding areas or water sources can improve your chances, as birds are more likely to be focused on feeding rather than your presence. Finally, consider using a ground blind or camouflage netting for better concealment when in open areas. Over time, birds may grow accustomed to you if you keep a respectful distance and move non-threateningly.
Check out the latest guides on bird watching gear
Author: William Flaiz