How to Read and Navigate with an Orienteering Map: A Beginner’s Guide
October 10, 2024
Navigating through nature can be both exhilarating and daunting. With the right skills and tools, however, you can turn your outdoor experiences into safe, enjoyable adventures. Orienteering maps might look complex at first glance, filled with symbols and details that are not on regular maps.
But learning to read these maps unlocks a whole new world. We’ve put together this detailed guide after thorough research and insights from experienced orienteers. Our goal is to make sure you feel confident and secure while exploring the wilderness. Let's start by examining what makes these maps so special.
To read and navigate with an orienteering map, start by familiarizing yourself with the map's symbols and features, ensuring you understand what each represents—such as terrain types and obstacles. Next, consistently align your map with the landscape, using a compass to orient it correctly, then plan your route while utilizing techniques like identifying Attack Points and breaking down your journey into manageable segments for improved focus on navigation.
Key Features of Orienteering Maps
One of the most important aspects of orienteering maps is their scale and detail. Typically, orienteering maps are produced at larger scales like 1:10,000 and 1:15,000. This means that 1 cm on the map corresponds to 100 meters or 150 meters in real-world distance.
The significance of this scale lies in its ability to provide a more precise representation of the terrain compared to standard topographic maps. With orienteering maps, you can see finer details about paths, vegetation, small landforms, and even minor elevation changes that can help you better navigate your course. The enhanced detail can be the difference between successfully finding your route and feeling lost amid a dense forest.
It’s essential to familiarize yourself with the chosen scale before heading out, as it influences how you interpret distances when plotting courses or estimating travel times.
Color Coding
Another critical feature to note is color coding. Orienteering maps utilize standardized colors to represent various terrain features. For example:
- Black: Man-made structures like roads and trails
- Blue: Water bodies such as lakes and rivers
- Brown: Landforms including hills and valleys
- Green: Dense vegetation
- Yellow: Open fields or clearings
By understanding this color scheme, you can quickly identify essential elements within the landscape at a glance—crucial when you're racing against time or trying to pinpoint your location during a competition or exploration. Knowing that green areas may present obstacles can inform decisions on which paths to take. Knowledge of these colors allows for rapid interpretations that save both time and energy.
Having grasped these fundamental features, it's important to next explore the aspects related to symbols and legends found on these maps; they provide key insights into navigating more complex terrains effectively.
Decoding Symbols and Legends
To navigate successfully, knowing how to interpret the symbols on your orienteering map is crucial. Each symbol represents vital information about the terrain you’re traversing, influencing your decisions as you move through the landscape. Understanding these symbols allows you to translate the two-dimensional representation of the map into actionable insights in three-dimensional space. For instance, contour lines provide guidance on elevation changes; recognizing whether a hill is steep or gradual can help you plan your route accordingly.
Common Symbols
Here are some common symbols you will encounter:
- Contour Lines: These lines indicate elevation and the shape of the terrain. The closer they are to one another, the steeper the slope. By analyzing contour patterns, you can prepare for challenging climbs or descents.
- Control Points: These are marked with circles, often numbered. They represent checkpoints you need to reach during your navigation course. Understanding their placement helps strategize your route effectively.
- Trails and Paths: Represented in dashed or solid lines, depending on their prominence. Solid lines may indicate well-maintained trails, while dashed lines suggest less distinct paths which might require more careful navigation through dense vegetation.
- Water Features: Lakes, rivers, and streams are highlighted in blue. Being aware of these features is vital not only for orientation but also for planning water stops on longer treks.
- Vegetation Boundaries: Different shades of green depict forest density. Lighter greens usually indicate areas with fewer trees, while dark greens signal denser forests. This knowledge can help you choose trails that align with your comfort level in navigating through thick woods.
Finding Legends
The legend plays a pivotal role in understanding all these symbols, effectively serving as a guidebook within your map itself. You can typically find the legend located at the side or bottom of the map—a treasure trove of information waiting to be explored. Before embarking on your navigational journey, make it a habit to study this key thoroughly.
Knowing what each symbol means not only makes navigation easier but also enhances your safety and efficiency in the field. Ignoring this step could lead to misinterpreting crucial elements of the landscape, resulting in unnecessary detours or even dangerous situations.
By grasping these foundational concepts, you'll be better prepared to confidently traverse varied terrains and utilize topographical features for effective navigation.
Navigating Terrain and Topography
Terrain and topography are not merely obstacles to overcome in orienteering; they are invaluable guides that can aid in your navigation. As you traverse various landscapes, recognizing physical features on your map can provide crucial insight into where you are and where you're headed. The natural world offers visual clues that can help guide you as much as the lines and symbols on your map.
Reading Contour Lines
At the heart of understanding topography are contour lines, which represent elevation changes across the land. Each line corresponds to a specific elevation, and by examining these lines, you can gauge the steepness or gentleness of the terrain. When contour lines are close together, this indicates a steep slope; conversely, when they are spaced widely apart, the slope is likely much gentler.
Practice makes perfect: One of the most effective ways to develop your contour line reading skills is by practicing with orienteering maps in familiar areas. Over time, your brain will begin to associate particular line formations with actual landscapes.
Identifying Key Terrain Features
Beyond simply reading lines on a map, identifying key terrain features becomes essential for effective navigation. Features like hills, valleys, ridges, and depressions tell you about the landscape you’re traversing. For instance, knowing that a spur—a point of high ground—looks different from a reentrant (a small valley) can mean the difference between a successful route and an unexpected detour.
I recall my first experience in orienteering when misjudging a reentrant for a ridge sent me off course and into unfamiliar territory. It was a learning moment that underscored just how vital it is to understand these natural features instead of taking them for granted.
After you've familiarized yourself with terrain interpretation through contour lines and prominent features, combining these insights with compass skills paves the way for enhanced navigation in any outdoor adventure.
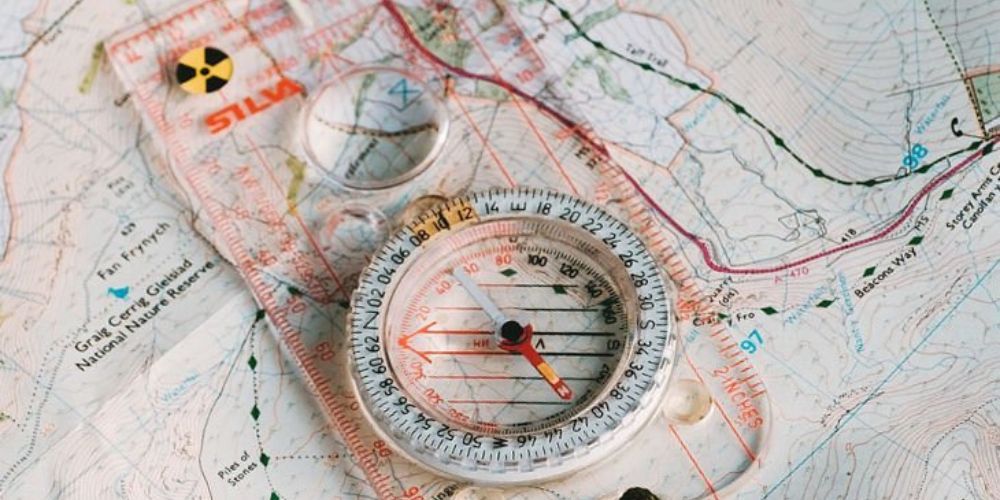
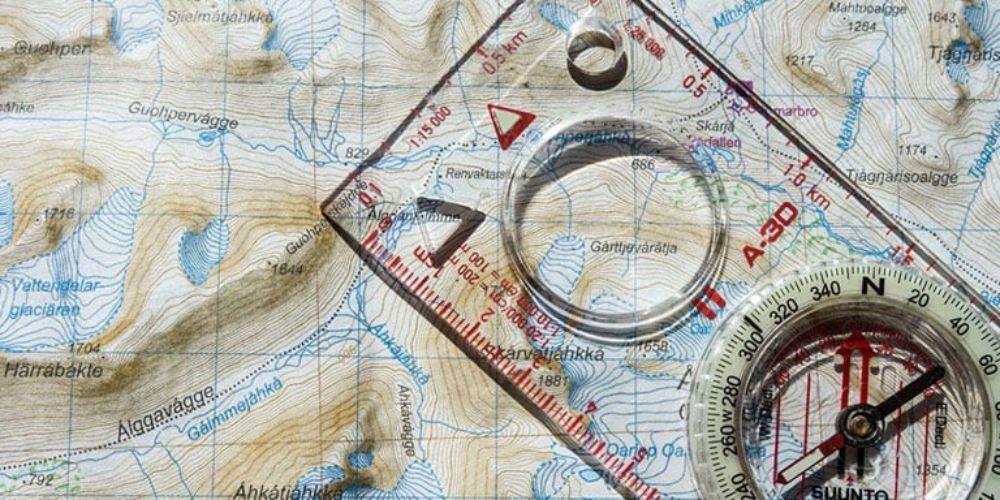
Mastering Basic Compass Skills
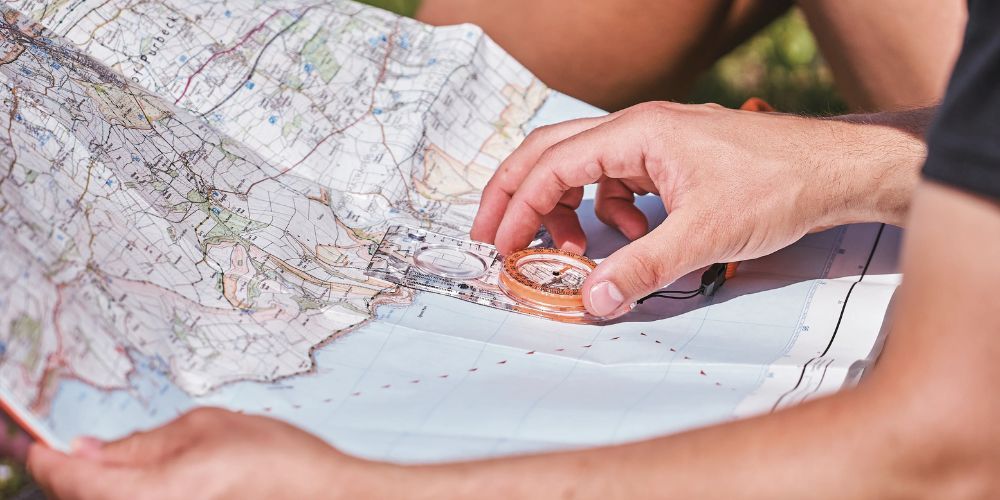
A compass serves as a vital tool in orienteering, acting as your silent partner that effortlessly guides you through dense woods, rocky terrains, and hidden trails. Understanding its use begins with two fundamental skills: taking a bearing and keeping your map oriented. These skills not only enhance your navigation abilities but also bring about a sense of confidence when exploring unfamiliar landscapes.
Taking a Bearing
To take a bearing, first place your compass flat on the map, ensuring it points towards your desired destination. It’s crucial to align the edge of the compass with both your current position and the endpoint; this creates a straight path on which to navigate. Next, rotate the compass housing so that the orienting arrow aligns with the map’s north. This step is pivotal—ensuring that you align the bearing accurately can mean the difference between finding your way or veering off course.
As you embark on your journey, following this bearing allows you to move confidently towards your destination. Pay attention to landmarks along the way—these serve as visual cues that affirm you're heading in the right direction.
Keeping the Map Oriented
One of the simplest yet most effective habits is to always keep your map oriented towards true north. Imagine holding your map with one hand while you grasp the compass in the other; ensure that the needle of the compass aligns with the north marker on the map. This method enhances situational awareness and significantly reduces disorientation, especially in areas where paths intersect or terrain changes quickly.
The importance of maintaining an oriented map cannot be overstated. In moments of uncertainty, simply glancing at an aligned map can clarify which direction you should head next. It’s akin to having a steadfast mentor by your side during chaotic times. Practicing this technique can become second nature with consistent use, making navigation feel almost automatic.
Think of keeping your map oriented like brushing your teeth—it's a small daily habit that pays off immensely over time.
While mastering these essential skills lays a solid foundation for any beginner, the next step involves diving deeper into more sophisticated strategies that will elevate your navigation experience.
Advanced Techniques: Thumbing and Planning
One of the most effective advanced techniques for improved navigation is known as thumbing. This method entails keeping your thumb on the map at your current location, serving as a constant reminder of where you are during your journey. Imagine reading a gripping novel, where your thumb acts as a bookmark; it keeps you grounded in the storyline, allowing you to immerse yourself fully without losing track of where you’ve been. In orienteering, this simple act minimizes distractions and reduces the need for frequent map checks, enabling you to focus on your surroundings while still being aware of your progress.
Additionally, thumbing fosters awareness of landmarks around you. As you move, check off key features that appear on the map; this not only reinforces your current position but also trains your brain to connect visual details with their representation on paper. The more you practice this technique, the more intuitive it becomes, helping you build a mental imagery of the terrain, which drastically improves navigation efficiency.
Moving beyond just tracking your position, effective route planning can transform your entire adventure into a well-structured expedition.
Route planning is about segmenting your journey into manageable parts, each defined by clear attack points—essentially, these are guideposts along your path that help you measure progress and make adjustments as needed. For example, think of breaking down a long hike into specific milestones rather than viewing it as one daunting task. This clarity not only motivates but allows for focused navigation strategies.
Route Planning
When planning each segment of your route, be sure to identify potential challenges and notable landmarks along the way. This approach ensures that even if conditions change unexpectedly—such as sudden weather shifts or obstacles—you’re prepared to adapt. Below is a simplified example of how to structure segments with attack points:
| Segment | Attack Point | Description |
|---|---|---|
| A-B | Hilltop | Moderate slope |
| B-C | Stream | Cross small river |
| C-D | Clearing | Easy open terrain |
Each leg should ideally represent a defined part of the journey—like moving from one well-marked trailhead to another—with distinct characteristics to keep in mind. By pinpointing specific locations such as hilltops or clearings as attack points, you effectively create a roadmap that guides decision-making on the fly during your trek.
Mastering these techniques ideally prepares you for various terrains, setting the stage for practical applications in different environments.
Applied Practice in Various Environments
Practical experience in different environments is invaluable for solidifying your orienteering skills. Each environment presents unique challenges and opportunities that can sharpen your navigation abilities if approached thoughtfully.
Forests and Woodlands
In dense forests, visibility can be quite limited, making it harder to see where you're going. One effective strategy is to use clearings or distinct tree formations as navigational markers. For instance, while navigating through a thick cluster of pines, I once miscalculated my direction because I didn’t account for how the trees would block my line of sight.
This experience taught me the importance of remaining vigilant and constantly confirming my path against the map. Always be aware that trails may seem straightforward but can become deceptive amidst heavy foliage.
Leaving the trees behind, we find ourselves navigating urban landscapes, where our sense of direction faces new tests.
Urban Areas
Urban orienteering comes with its own set of challenges. Tall buildings and busy streets create obstacles that can overwhelm even seasoned navigators. Here, it's important to utilize man-made structures indicated in black on your map. These features often serve as reliable points of reference.
When I first attempted urban navigation, I discovered that street names can be just as valuable as physical landmarks. Knowing how to read a map in a city can make all the difference; familiarizing yourself with local terrain before heading out is one of the best tips I can offer.
Once you've grappled with city streets, the open terrains present a different kind of puzzle altogether.
Open Terrain
In open areas like moorlands or fields, you'll find fewer natural barriers; visibility is rarely an issue. However, this doesn't mean navigation becomes easy—visible landmarks such as hills, water bodies, or rock formations become crucial navigational aids.
While moving across open fields, always keep a mental note of these landmarks from your map. You might think it’s difficult to get lost in such wide spaces, but without existing cues or features to guide you, it can be surprisingly easy to drift off course. Additionally, uniformly flat terrain may not provide enough reference points leading to disorientation.
In each of these environments, practicing various strategies enhances your adaptability and improves overall navigation accuracy as you immerse yourself in practice.
Start implementing these techniques during your practice runs—whether you're trekking through woods, navigating city blocks, or crossing fields—and you’ll become more confident in using orienteering maps no matter where your adventure takes you.
By consistently honing your skills across diverse landscapes, you’ll build not only proficiency but also the confidence needed for successful navigation in any orienteering scenario.
What is orienteering, and why is map reading important?
Orienteering is an outdoor activity where participants navigate through a course using a map and compass to reach specific checkpoints. Map reading is essential in orienteering because it allows you to interpret your surroundings and follow the correct route. An orienteering map provides detailed information about the landscape, including terrain, trails, and man-made features, which helps participants find the fastest and safest route through various environments. Understanding how to read the map ensures you can identify your current location, plan your route, and avoid getting lost.
How do you understand symbols and colors on an orienteering map?
Orienteering maps use a universal set of symbols and colors to represent different types of terrain, features, and obstacles. For example, green indicates dense vegetation, blue represents water, and brown shows contour lines (indicating elevation changes). Symbols like dashed lines mark trails, black circles indicate boulders, and small triangles often represent checkpoints. Learning these symbols helps you quickly assess the landscape, make navigation decisions, and understand potential challenges in your path. Beginners should familiarize themselves with a map key or legend, which explains each color and symbol used.
What are the basic steps for navigating with a map and compass?
Start by orienting your map to match the terrain around you. Place your compass on the map with the direction-of-travel arrow pointing to the top. Turn yourself and the map until the compass needle aligns with the north arrow on the map. From there, find your starting point and locate the direction to your next checkpoint. Keep the compass steady, follow the direction of travel, and use visible landmarks as guides. Regularly check your map, adjust your direction as needed, and always be aware of your surroundings to ensure you stay on course.
Author: William Flaiz